Server Sent Events
Introduction
Server Sent Events (SSE) is a server push technology which enables automatically updates the client. Traditionally when a client needs information from the backend it has to send a request to it. With technology like Server Sent Events or WebSockets it's possible to receive information in real-time without manually sending requests.
Server Sent Events in opposite to WebSockets are mono-directional. It means that only a server can send data to the client. Another important difference is that event streams are always decoded as UTF-8. There is no way to specify another character encoding. The use case of SSE can be updating the app statuses, sending push notifications, or news feeds when we don't need a bi-directional communication.
Example
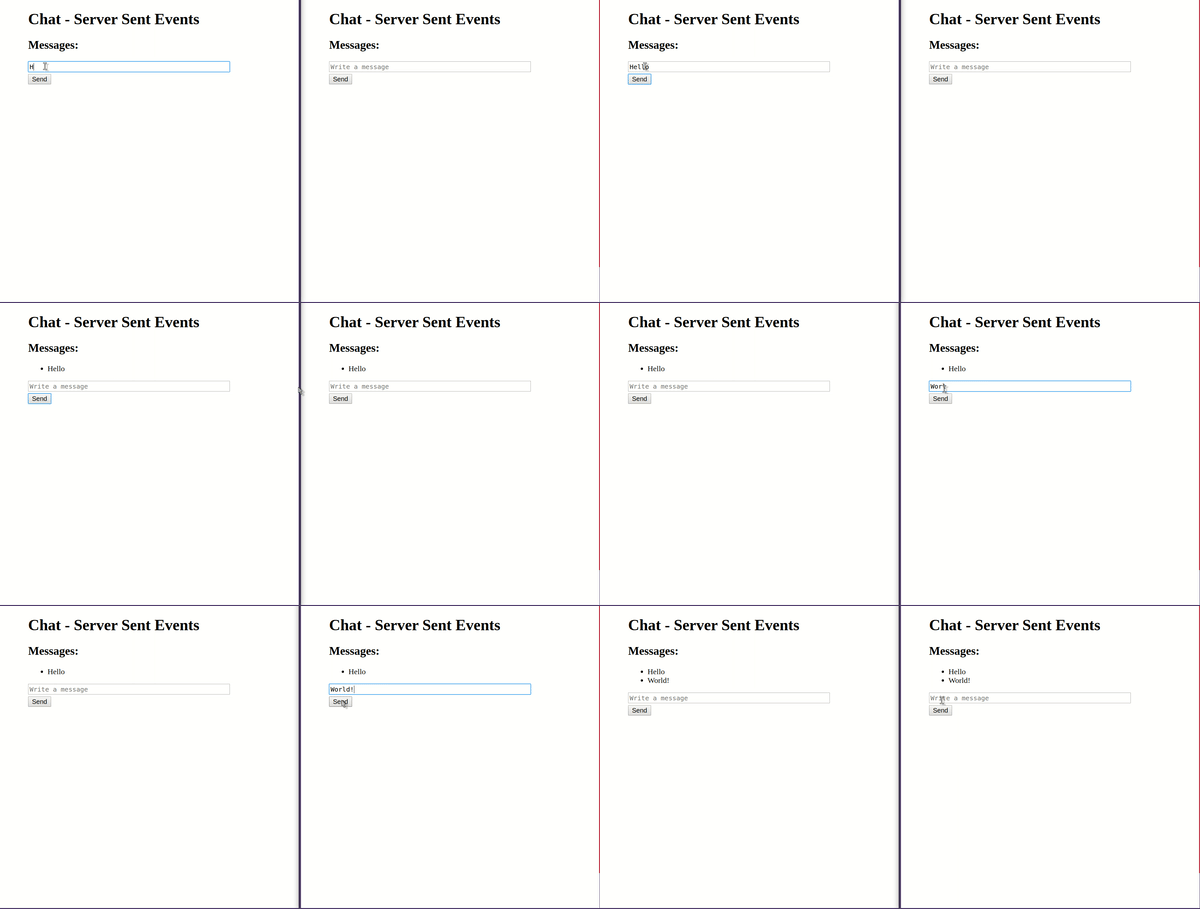
This example explains how SSE works. To show how this technology works we will implement a simple real-time chat. The Full example can be found here.
Communication between client and server is initialized only once by the client. Our endpoint which will push notifications to the client has to be configured properly.
Below we have a fragment of code that is responsible for handling the request initialized by the client.
Backend
1if (pathname === "/sse" && method === "get") {2 res.writeHead(200, {3 "Content-Type": "text/event-stream",4 Connection: "keep-alive",5 });67 onMessage = (message) => res.write(`data: ${message}\n\n`);8 chatEmitter.on("message", onMessage);910 res.on("close", () => {11 console.log("Closed connection with the client.");12 chatEmitter.off("message", onMessage);13 });14}The first thing to do is to set proper headers.
1res.writeHead(200, {2 "Content-Type": "text/event-stream",3 Connection: "keep-alive",4});According to the specification we are setting two headers. The Content-Type emitted to the client will be a text/event-stream and Connection header with keep-alive value that allows a connection to be persistent.
Attach event listeners to this request.
1onMessage = (message) => res.write(`data: ${message}\n\n`);2chatEmitter.on("message", onMessage);Because the responsibility of the /sse endpoint is streaming data to the client, we need another endpoint which will be responsible for processing the messages sent by users. In this place, we will listen to the event fired by the second endpoint and then we'll stream the data to the client.
It's important that data saved to the response stream to be plain text. Also according to the specification we must use a specific format. The key data: is mandatory the same as two "\n" characters at the end.
Removing listeners
1res.on("close", () => {2 console.log("Closed connection with the client.");3 chatEmitter.off("message", onMessage);4});When the connection is closed we don't need an event listener, so we can remove it.
Now, we need to add a second endpoint which will handle the messages sent by clients.
1else if (pathname === "/api/message" && method === "post") {2 let body = "";3 req.on("data", (chunk) => {4 body += chunk.toString();5 });6 req.on("end", () => {7 res.writeHead(200);8 const { message } = JSON.parse(body);9 chatEmitter.emit("message", message);10 res.end();11 });12}There is nothing surprising. We parse incoming request body, then we emit "message" event and at the end we are sending the response.
Frontend
We've already covered the backend logic. Now we'll focus on frontend.
The index.html which is sent by the backend contains HTML elements and inline script responsible for handling logic. Let's focus on the script.
1const eventSource = new EventSource('http://localhost:3000/sse')2eventSource.onopen = () => { console.log('Established the connection wit server.') }3eventSource.onmessage = ({ data }) => showMessage(data)45document.getElementById('submit').addEventListener('click', sendMessage)67function showMessage (message) {8 const messagesList$ = document.getElementById('messages')9 listItem$ = document.createElement('li')10 listItem$.innerText = message11 messagesList$.appendChild(listItem$)12}1314async function sendMessage () {15 const textarea$ = document.getElementById('textarea')16 try {17 await fetch(`http://localhost:3000/api/message`, { 18 body: JSON.stringify({ message: textarea$.value }),19 method: 'POST'20 })21 } catch (err) { console.log(err) }22 textarea$.value = ''23}As it was mentioned before, the client is responsible for initialization of the connection with the server. Instead of doing this via fetch API, we are using here dedicated to this purpose an EventSource API.
1const eventSource = new EventSource('http://localhost:3000/sse')2eventSource.onopen = () => { console.log('Established the connection wit server.') }3eventSource.onmessage = ({ data }) => showMessage(data)When the EventSource constructor is called, our client sends the request to the backend. Created event source object allows us to listen to built-in events like onopen, onmessage, onerror. Of course it's also possible to listen to custom events emitted by our server.
In this example, we're listening on onopen and onmessage event. The first one occurs when the connection with the server has been opened. The second one occurs when the client receives the stream from the backend.
Our onmessage handler extracts from delivered messageEvent the data property, which contains the message sent by any user. Then we are calling the showMessage method which appends a new message to the DOM.
We've just covered the whole logic needed to establish a persistent connection with our backend and respond to emitted events. The rest of the code is responsible for handling message sending to the backend and showing received message.
